Roof Sheathing Flush With Fascia

Installing Soffit And Fascia Fascia Board Fascia Roof Sheathing

Air Sealing Sip Seams Roof Insulation Roofing Structural Insulated Panels

Image Result For Purlins Vs Osb Sheathing Osb Sheathing Sheathing Osb

Sub Fascias Are Not Required By Code The Fascia Can Be Nailed Directly To The Truss Tails But While The Sub Fascia Is Typical Submarine Fascia Floor Plans

Drip Edge Detail Rigid Insulation Drip Edge Fascia

Drip Edge And The Irc Jlc Online
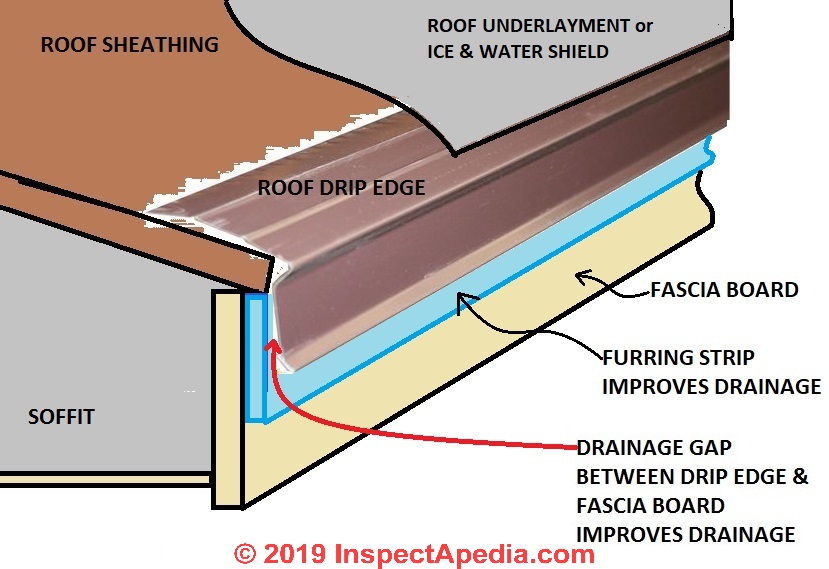
The drip edge should be installed over a piece of 1 2 furring strip so that it stands off from the fascia or rafter tails.
Roof sheathing flush with fascia.

Vinyl Gutter Woes Shingles Home Depot Installing Flush House Remodeling Decorating Construction Energy Use Kitchen Vinyl Gutter Shingling Drip Edge

Follow These Recommendations To Save Money When Installing Soffit Roof Soffits Vinyl Siding Installation Roof

Image Result For Gutter To Boundary Wall Detail Boundary Walls House Extension Design Roof Detail
Https Www Habitatmidohio Org File Download 3b8c8e13 5e17 4d63 B5e6 199874c4c03e
Source : pinterest.com
